Handling node upgrades
There are many scenarios where you have to do planned maintenance on your cluster. These could be software upgrades, upgrading your machines, or applying security patches that need restart. YugabyteDB performs rolling upgrades, where nodes are taken offline one at a time, upgraded, and restarted, with zero downtime for the universe as a whole.
Let's see how YugabyteDB is resilient during planned maintenance, continuing without any service interruption.
Setup
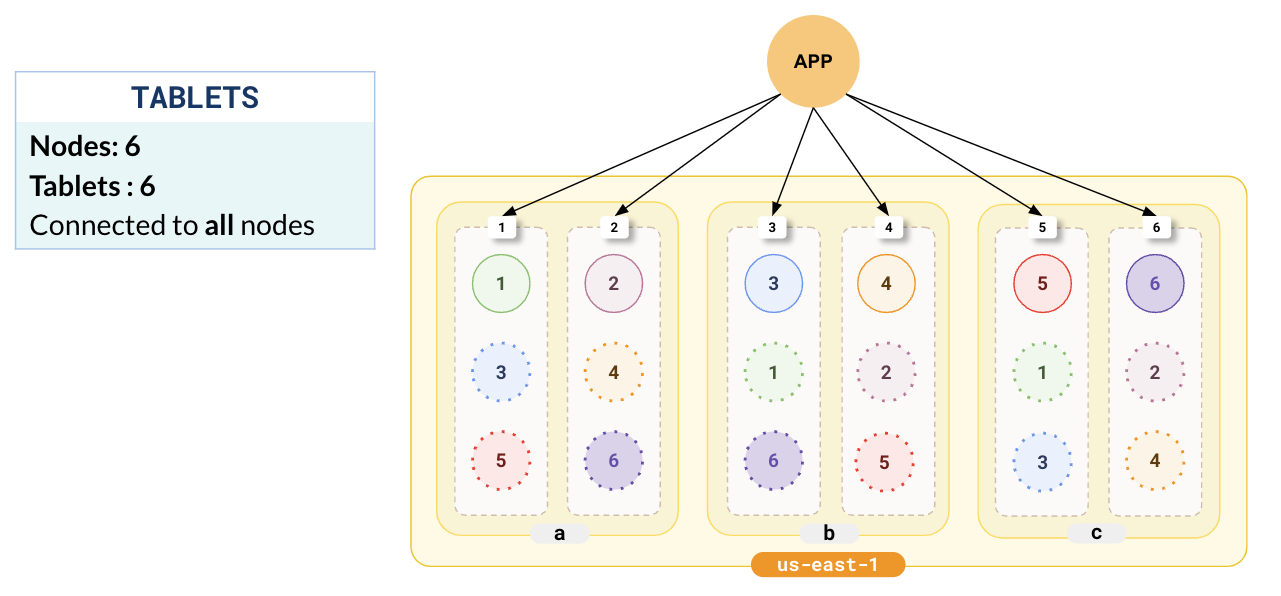
Consider a setup where YugabyteDB is deployed in a single region (us-east-1) across 3 zones, with leaders and followers distributed across the 3 zones (a,b,c) with 6 nodes 1-6.
Set up a local cluster
If a local universe is currently running, first destroy it.
Start a local six-node universe with an RF of 3 by first creating a single node, as follows:
./bin/yugabyted start \
                --advertise_address=127.0.0.1 \
                --base_dir=${HOME}/var/node1 \
                --cloud_location=aws.us-east.us-east-1a
On macOS, the additional nodes need loopback addresses configured, as follows:
sudo ifconfig lo0 alias 127.0.0.2
sudo ifconfig lo0 alias 127.0.0.3
sudo ifconfig lo0 alias 127.0.0.4
sudo ifconfig lo0 alias 127.0.0.5
sudo ifconfig lo0 alias 127.0.0.6
Next, join more nodes with the previous node as needed. yugabyted automatically applies a replication factor of 3 when a third node is added.
Start the second node as follows:
./bin/yugabyted start \
                --advertise_address=127.0.0.2 \
                --base_dir=${HOME}/var/node2 \
                --cloud_location=aws.us-east.us-east-1a \
                --join=127.0.0.1
Start the third node as follows:
./bin/yugabyted start \
                --advertise_address=127.0.0.3 \
                --base_dir=${HOME}/var/node3 \
                --cloud_location=aws.us-east.us-east-1b \
                --join=127.0.0.1
Start the fourth node as follows:
./bin/yugabyted start \
                --advertise_address=127.0.0.4 \
                --base_dir=${HOME}/var/node4 \
                --cloud_location=aws.us-east.us-east-1b \
                --join=127.0.0.1
Start the fifth node as follows:
./bin/yugabyted start \
                --advertise_address=127.0.0.5 \
                --base_dir=${HOME}/var/node5 \
                --cloud_location=aws.us-east.us-east-1c \
                --join=127.0.0.1
Start the sixth node as follows:
./bin/yugabyted start \
                --advertise_address=127.0.0.6 \
                --base_dir=${HOME}/var/node6 \
                --cloud_location=aws.us-east.us-east-1c \
                --join=127.0.0.1
After starting the yugabyted processes on all the nodes, configure the data placement constraint of the universe, as follows:
./bin/yugabyted configure data_placement --base_dir=${HOME}/var/node1 --fault_tolerance=zone
This command can be executed on any node where you already started YugabyteDB.
To check the status of a running multi-node universe, run the following command:
./bin/yugabyted status --base_dir=${HOME}/var/node1
Setup
To set up a universe, refer to Set up a YugabyteDB Anywhere universe.The application typically connects to all the nodes in the cluster as shown in the following illustration.
Upgrading a node
When upgrading a node or performing maintenance, the first step is to take it offline.
Take a node offline locally
To take a node offline locally, you can just stop the node.
./bin/yugabyted stop --base_dir=${HOME}/var/node4
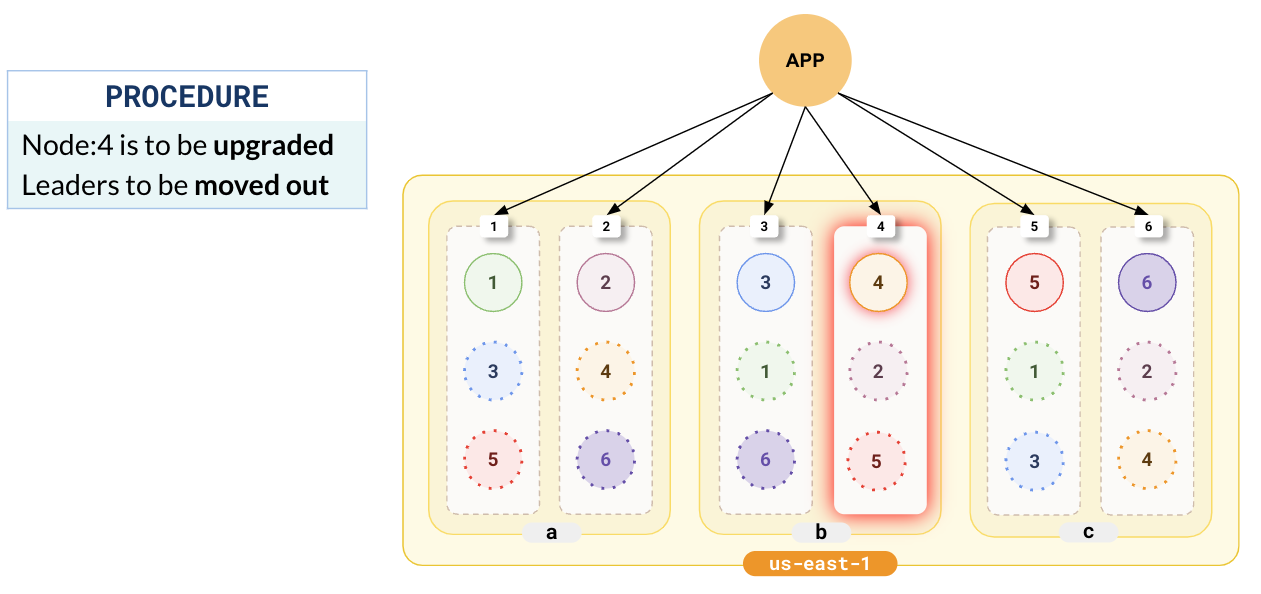
In the following illustration, we have chosen node 4 to be upgraded.
Leaders move
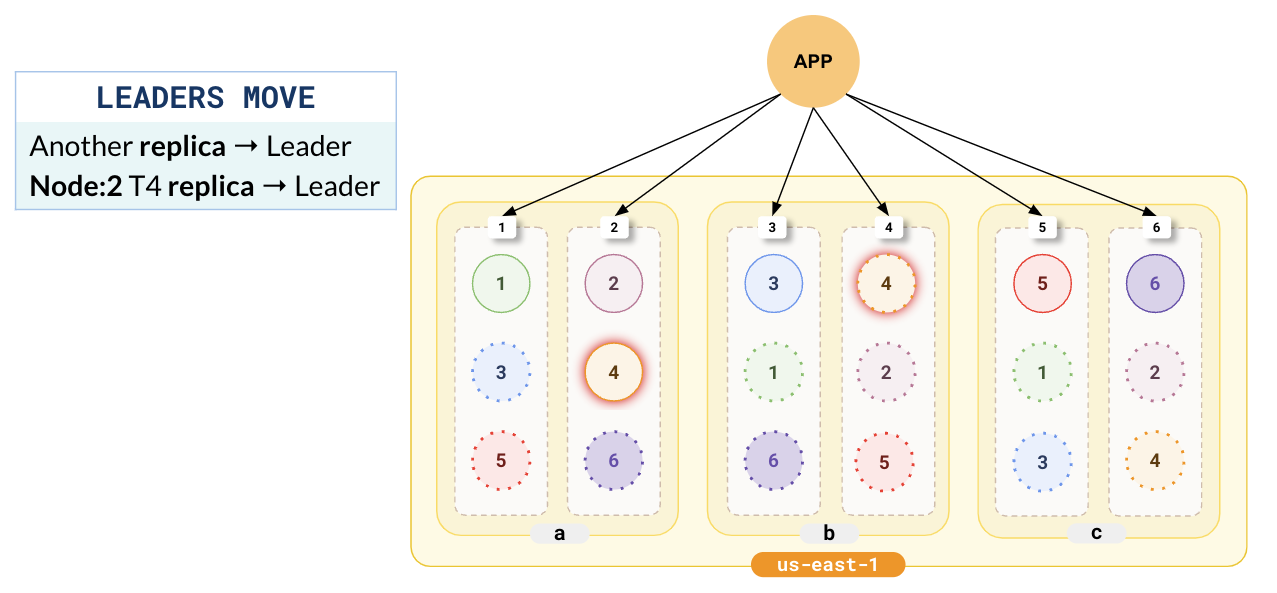
If there are leaders on the node to be upgraded, they must first be moved so that there is no service disruption. Stopping the node automatically triggers a leader election with a hint to choose a new leader outside the zone where the node is located. This is repeated for all the leaders on the node. Note that, even though the followers in this node will soon go offline, writes won't be affected as there are followers located in other zones.
In the following illustration, the follower for tablet-4 in node-2 located in zone-a has been elected as the new leader, and the replica of tablet-4 in node-4 has been downgraded to follower.
Node goes offline
After the leaders are moved out of the node, YugabyteDB takes the node offline. Connections that have already been established to the node start timing out (as the default TCP timeout is about 15s). New connections also cannot be established.
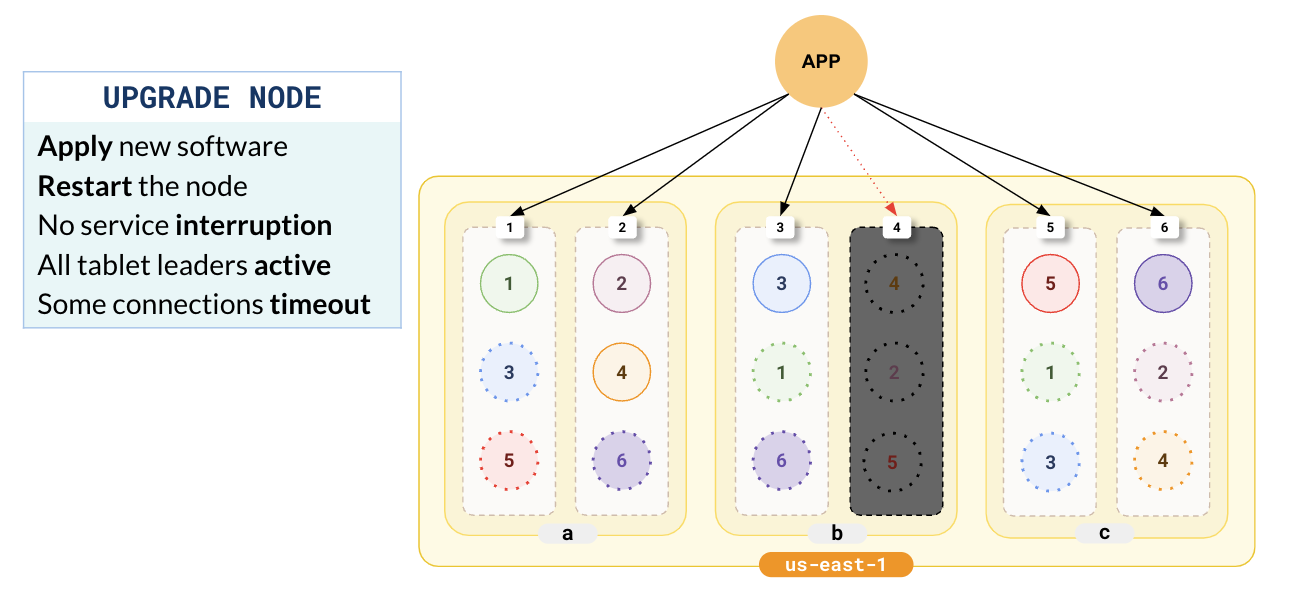
At this point, you can perform your maintenance, add new software, or upgrade the hardware. There is no service disruption during this period as all the tablets have active leaders.
Bring the node online
After completing the upgrade and the required maintenance, you restart the node.
Bring back a node online locally
To simulate bringing back a node online locally, you can just start the stopped node.
./bin/yugabyted stop --base_dir=${HOME}/var/node4
The node is automatically added back into the cluster. The cluster will notice that the leaders and followers are unbalanced across the cluster, and trigger a re-balance and leader election. This ensures that the leaders and followers are evenly distributed. All the nodes in the cluster are fully functional and can start taking in load.
Notice in the following illustration that the tablet followers in node-4 are updated with the latest data and are made leaders.
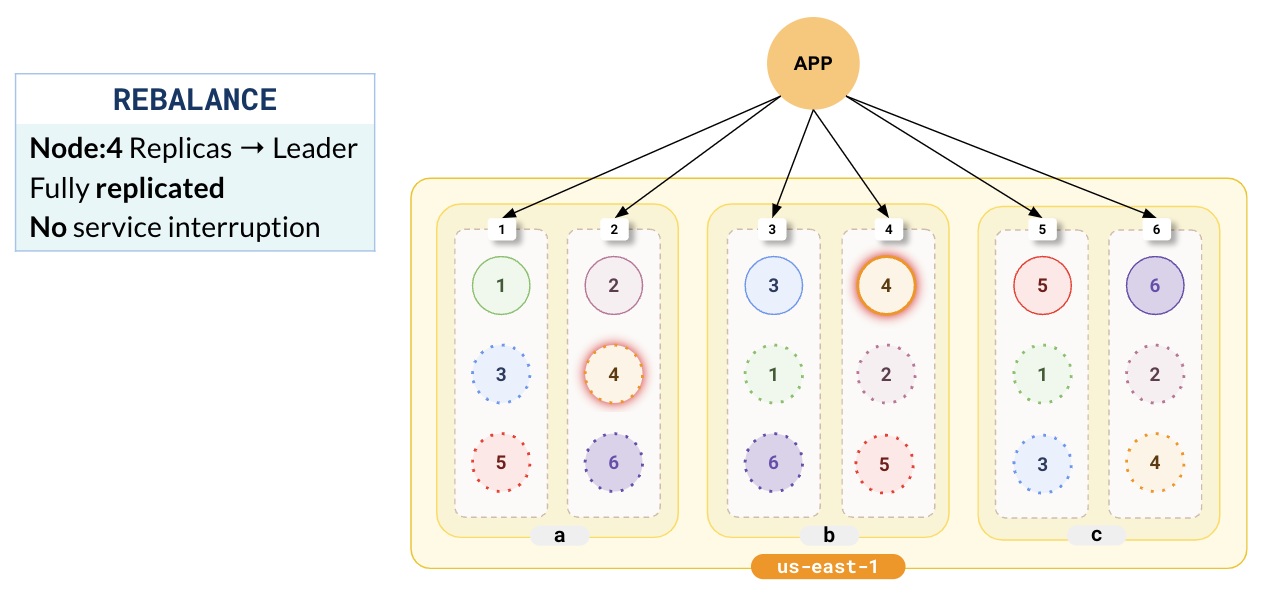
During this entire process, there is neither data loss nor service disruption.