Google Kubernetes Engine (GKE)
Prerequisites
You must have a multi-zonal or regional GKE cluster that has Helm configured. If you have not installed the Helm client (helm), see Installing Helm.
The YugabyteDB Helm Chart has been tested with the following software versions:
- GKE running Kubernetes 1.18 (or later) with nodes such that a total of 12 CPU cores and 45 GB RAM can be allocated to YugabyteDB. This can be three nodes with 4 CPU core and 15 GB RAM allocated to YugabyteDB.
n1-standard-8is the minimum instance type that meets these criteria. - Helm 3.4 or later
- YugabyteDB docker image (
yugabytedb/yugabyte) 2.1.0 or later - For optimal performance, ensure you've set the appropriate system limits using
ulimiton each node in your Kubernetes cluster.
The following steps show how to meet these prerequisites.
-
Download and install the Google Cloud SDK.
-
Configure defaults for
gcloud
Set the project ID as yugabyte. You can change this as per your need.
$ gcloud config set project yugabyte
- Install
kubectl
After installing the Google Cloud SDK, install the kubectl command line tool by running the following command.
$ gcloud components install kubectl
Note that GKE is usually 2 or 3 major releases behind the upstream/OSS Kubernetes release. This means you have to make sure that you have the latest kubectl version that is compatible across different Kubernetes distributions if that's what you intend to.
- Ensure
helmis installed
First, check to see if Helm is installed by using the Helm version command.
$ helm version
You should see something similar to the following output. Note that the tiller server side component has been removed in Helm 3.
version.BuildInfo{Version:"v3.0.3", GitCommit:"ac925eb7279f4a6955df663a0128044a8a6b7593", GitTreeState:"clean", GoVersion:"go1.13.6"}
1. Create a GKE cluster
Create regional cluster
Following command creates a 3-node cluster with 1 node each in the us-central1-a, us-central1-b and us-central1-c zones.
$ gcloud container clusters create my-regional-cluster \
     --machine-type=n1-standard-8 \
     --num-nodes 1 \
     --region us-central1 \
     --node-locations us-central1-a,us-central1-b,us-central1-c
...
NAME                 LOCATION     MASTER_VERSION  MASTER_IP      MACHINE_TYPE   NODE_VERSION    NUM_NODES  STATUS
my-regional-cluster  us-central1  1.14.10-gke.17  35.226.36.261  n1-standard-8  1.14.10-gke.17  3          RUNNING
As stated in the Prerequisites section, the default configuration in the YugabyteDB Helm Chart requires Kubernetes nodes to have a total of 12 CPU cores and 45 GB RAM allocated to YugabyteDB. This can be three nodes with 4 CPU cores and 15 GB RAM allocated to YugabyteDB. The smallest Google Cloud machine type that meets this requirement is n1-standard-8 which has 8 CPU cores and 30 GB RAM.
Create a storage class
We need to specify WaitForFirstConsumer mode for the volumeBindingMode so that volumes will be provisioned according to pods' zone affinities.
Copy the contents below to a file named storage.yaml.
kind: StorageClass
apiVersion: storage.k8s.io/v1
metadata:
  name: yb-storage
provisioner: kubernetes.io/gce-pd
allowVolumeExpansion: true
volumeBindingMode: WaitForFirstConsumer
parameters:
  type: pd-ssd
  fsType: xfs
Apply the above configuration to your cluster.
$ kubectl apply -f storage.yaml
2. Create a YugabyteDB cluster
Add charts repository
To add the YugabyteDB charts repository, run the following command.
$ helm repo add yugabytedb https://charts.yugabyte.com
Make sure that you have the latest updates to the repository by running the following command.
$ helm repo update
Validate that you have the updated Chart version.
$ helm search repo yugabytedb/yugabyte --version 2.23.1
NAME                 CHART VERSION  APP VERSION   DESCRIPTION
yugabytedb/yugabyte  2.23.1          2.23.1.0-b220  YugabyteDB is the high-performance distributed ...
Create override files
Copy the contents below to a file named overrides-us-central1-a.yaml.
isMultiAz: True

AZ: us-central1-a

masterAddresses: "yb-master-0.yb-masters.yb-demo-us-central1-a.svc.cluster.local:7100,yb-master-0.yb-masters.yb-demo-us-central1-b.svc.cluster.local:7100,yb-master-0.yb-masters.yb-demo-us-central1-c.svc.cluster.local:7100"

storage:
  master:
    storageClass: "yb-storage"
  tserver:
    storageClass: "yb-storage"

replicas:
  master: 1
  tserver: 1
  totalMasters: 3

gflags:
  master:
    placement_cloud: "gke"
    placement_region: "us-central1"
    placement_zone: "us-central1-a"
  tserver:
    placement_cloud: "gke"
    placement_region: "us-central1"
    placement_zone: "us-central1-a"
Copy the contents below to a file named overrides-us-central1-b.yaml.
isMultiAz: True

AZ: us-central1-b

masterAddresses: "yb-master-0.yb-masters.yb-demo-us-central1-a.svc.cluster.local:7100,yb-master-0.yb-masters.yb-demo-us-central1-b.svc.cluster.local:7100,yb-master-0.yb-masters.yb-demo-us-central1-c.svc.cluster.local:7100"

storage:
  master:
    storageClass: "yb-storage"
  tserver:
    storageClass: "yb-storage"

replicas:
  master: 1
  tserver: 1
  totalMasters: 3

gflags:
  master:
    placement_cloud: "gke"
    placement_region: "us-central1"
    placement_zone: "us-central1-b"
  tserver:
    placement_cloud: "gke"
    placement_region: "us-central1"
    placement_zone: "us-central1-b"
Copy the contents below to a file named overrides-us-central1-c.yaml.
isMultiAz: True

AZ: us-central1-c

masterAddresses: "yb-master-0.yb-masters.yb-demo-us-central1-a.svc.cluster.local:7100,yb-master-0.yb-masters.yb-demo-us-central1-b.svc.cluster.local:7100,yb-master-0.yb-masters.yb-demo-us-central1-c.svc.cluster.local:7100"

storage:
  master:
    storageClass: "yb-storage"
  tserver:
    storageClass: "yb-storage"

replicas:
  master: 1
  tserver: 1
  totalMasters: 3

gflags:
  master:
    placement_cloud: "gke"
    placement_region: "us-central1"
    placement_zone: "us-central1-c"
  tserver:
    placement_cloud: "gke"
    placement_region: "us-central1"
    placement_zone: "us-central1-c"
Install YugabyteDB
Install YugabyteDB in the Kubernetes cluster using the commands below.
For Helm, you have to first create the 3 namespaces.
$ kubectl create namespace yb-demo-us-central1-a
$ kubectl create namespace yb-demo-us-central1-b
$ kubectl create namespace yb-demo-us-central1-c
Now create the overall YugabyteDB cluster in such a way that one third of the nodes are hosted in each zone.
$ helm install yb-demo-us-central1-a yugabytedb/yugabyte \
 --version 2.23.1 \
 --namespace yb-demo-us-central1-a \
 -f overrides-us-central1-a.yaml --wait
$ helm install yb-demo-us-central1-b yugabytedb/yugabyte \
 --version 2.23.1 \
 --namespace yb-demo-us-central1-b \
 -f overrides-us-central1-b.yaml --wait
$ helm install yb-demo-us-central1-c yugabytedb/yugabyte \
 --version 2.23.1 \
 --namespace yb-demo-us-central1-c \
 -f overrides-us-central1-c.yaml --wait
3. Check the cluster status
You can check the status of the cluster using various commands noted below.
Check the pods.
$ kubectl get pods --all-namespaces
NAMESPACE               NAME          READY   STATUS    RESTARTS   AGE
...
yb-demo-us-central1-a   yb-master-0   2/2     Running   0          6m54s
yb-demo-us-central1-a   yb-tserver-0  2/2     Running   0          6m55s
yb-demo-us-central1-b   yb-master-0   2/2     Running   0          3m56s
yb-demo-us-central1-b   yb-tserver-0  2/2     Running   0          3m57s
yb-demo-us-central1-c   yb-master-0   2/2     Running   0          100s
yb-demo-us-central1-c   yb-tserver-0  2/2     Running   0          100s
Check the services.
$ kubectl get services --all-namespaces
NAMESPACE               NAME                   TYPE           CLUSTER-IP      EXTERNAL-IP      PORT(S)                                        AGE
...
yb-demo-us-central1-a   yb-master-ui           LoadBalancer   10.27.249.152   34.71.83.45      7000:31927/TCP                                 9m33s
yb-demo-us-central1-a   yb-masters             ClusterIP      None            <none>           7100/TCP,7000/TCP                              9m33s
yb-demo-us-central1-a   yb-tserver-service     LoadBalancer   10.27.255.103   34.71.106.168    6379:31373/TCP,9042:32627/TCP,5433:30983/TCP   9m33s
yb-demo-us-central1-a   yb-tservers            ClusterIP      None            <none>           7100/TCP,9000/TCP,6379/TCP,9042/TCP,5433/TCP   9m33s
yb-demo-us-central1-b   yb-master-ui           LoadBalancer   10.27.240.40    35.188.198.123   7000:32217/TCP                                 6m35s
yb-demo-us-central1-b   yb-masters             ClusterIP      None            <none>           7100/TCP,7000/TCP                              6m35s
yb-demo-us-central1-b   yb-tserver-service     LoadBalancer   10.27.255.60    34.71.140.1      6379:30036/TCP,9042:31514/TCP,5433:31103/TCP   6m35s
yb-demo-us-central1-b   yb-tservers            ClusterIP      None            <none>           7100/TCP,9000/TCP,6379/TCP,9042/TCP,5433/TCP   6m35s
yb-demo-us-central1-c   yb-master-ui           LoadBalancer   10.27.247.234   34.68.203.224    7000:31090/TCP                                 4m18s
yb-demo-us-central1-c   yb-masters             ClusterIP      None            <none>           7100/TCP,7000/TCP                              4m18s
yb-demo-us-central1-c   yb-tserver-service     LoadBalancer   10.27.243.195   35.223.214.205   6379:31689/TCP,9042:31639/TCP,5433:32685/TCP   4m18s
yb-demo-us-central1-c   yb-tservers            ClusterIP      None            <none>           7100/TCP,9000/TCP,6379/TCP,9042/TCP,5433/TCP   4m18s
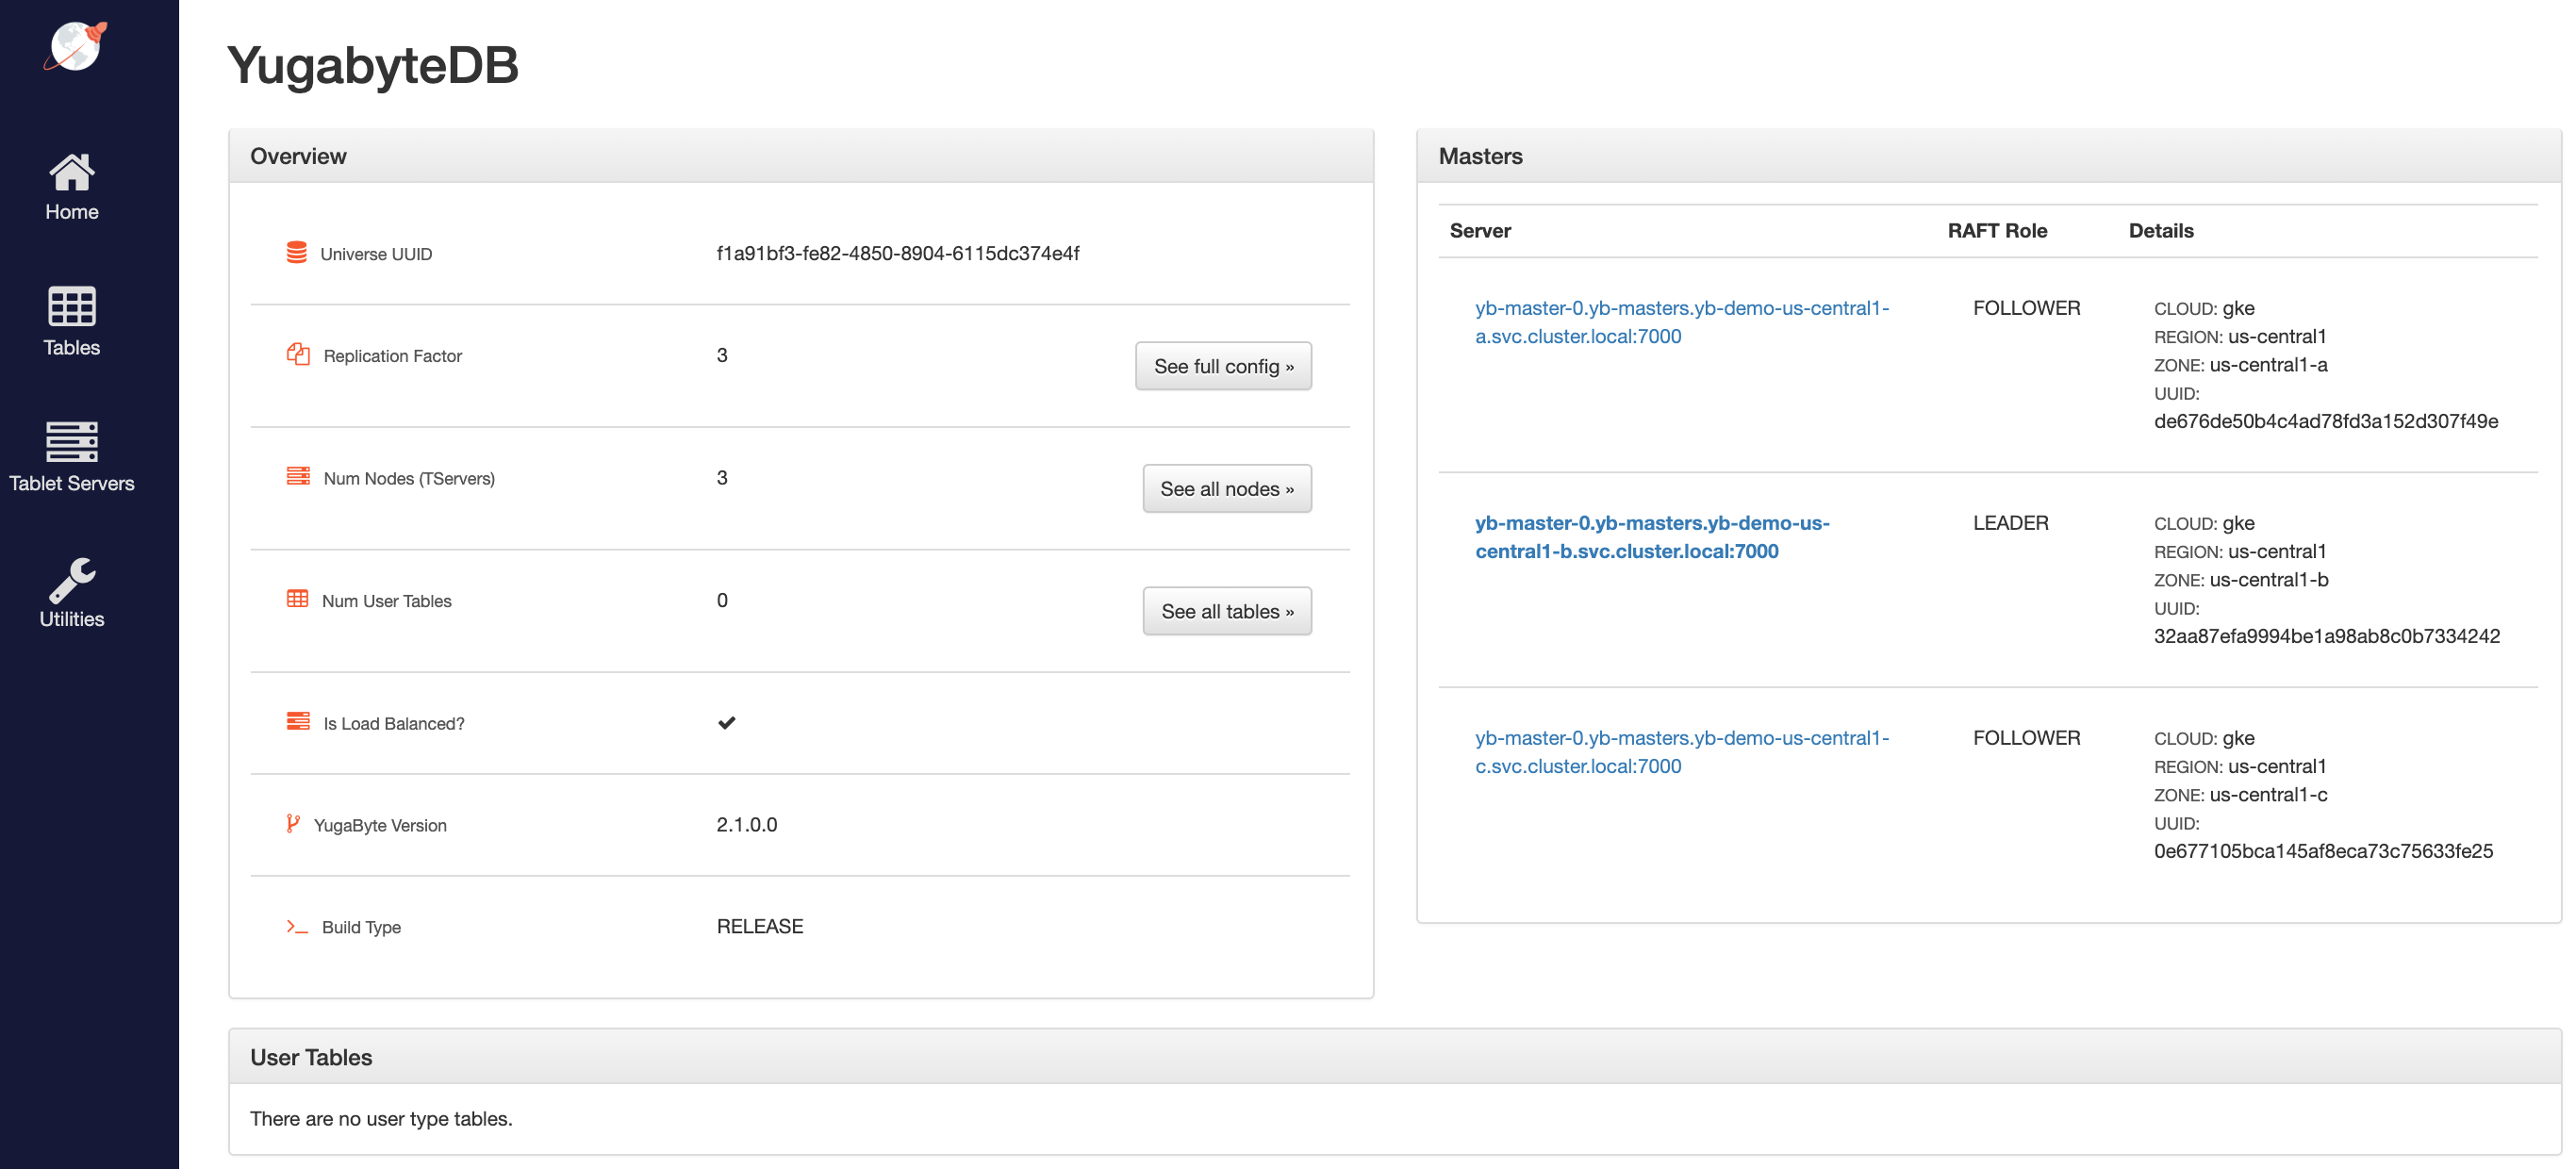
Access the yb-master Admin UI for the cluster at http://<external-ip>:7000 where external-ip refers to one of the yb-master-ui services. Note that you can use any of the above three services for this purpose since all of them will show the same cluster metadata.

4. Configure zone-aware replica placement
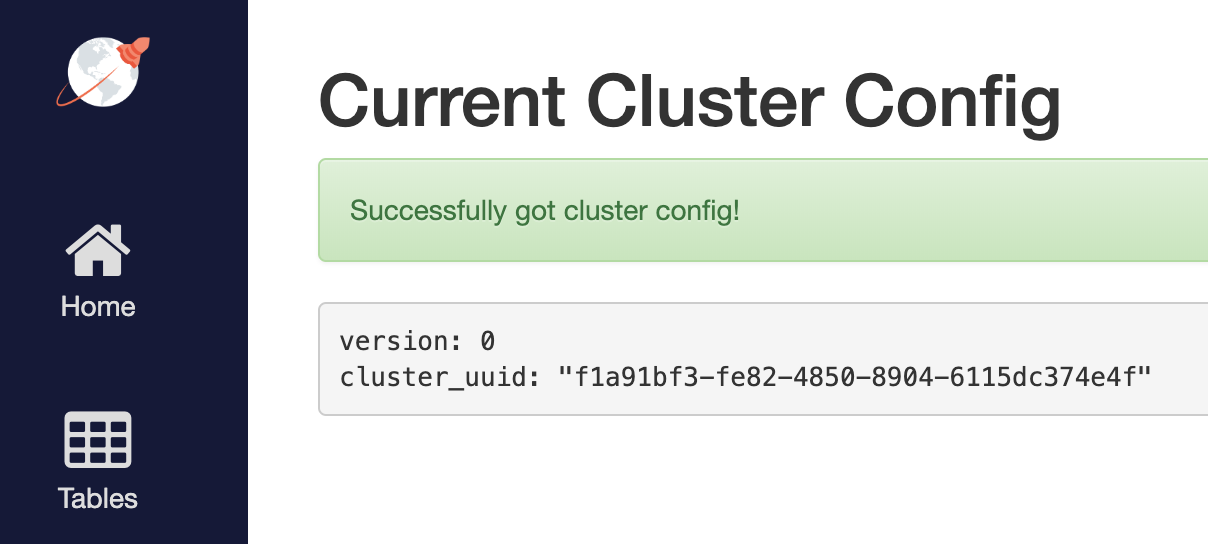
Default replica placement policy treats every yb-tserver as equal irrespective of its placement_* setting. Go to http://<external-ip>:7000/cluster-config to confirm that the default configuration is still in effect.

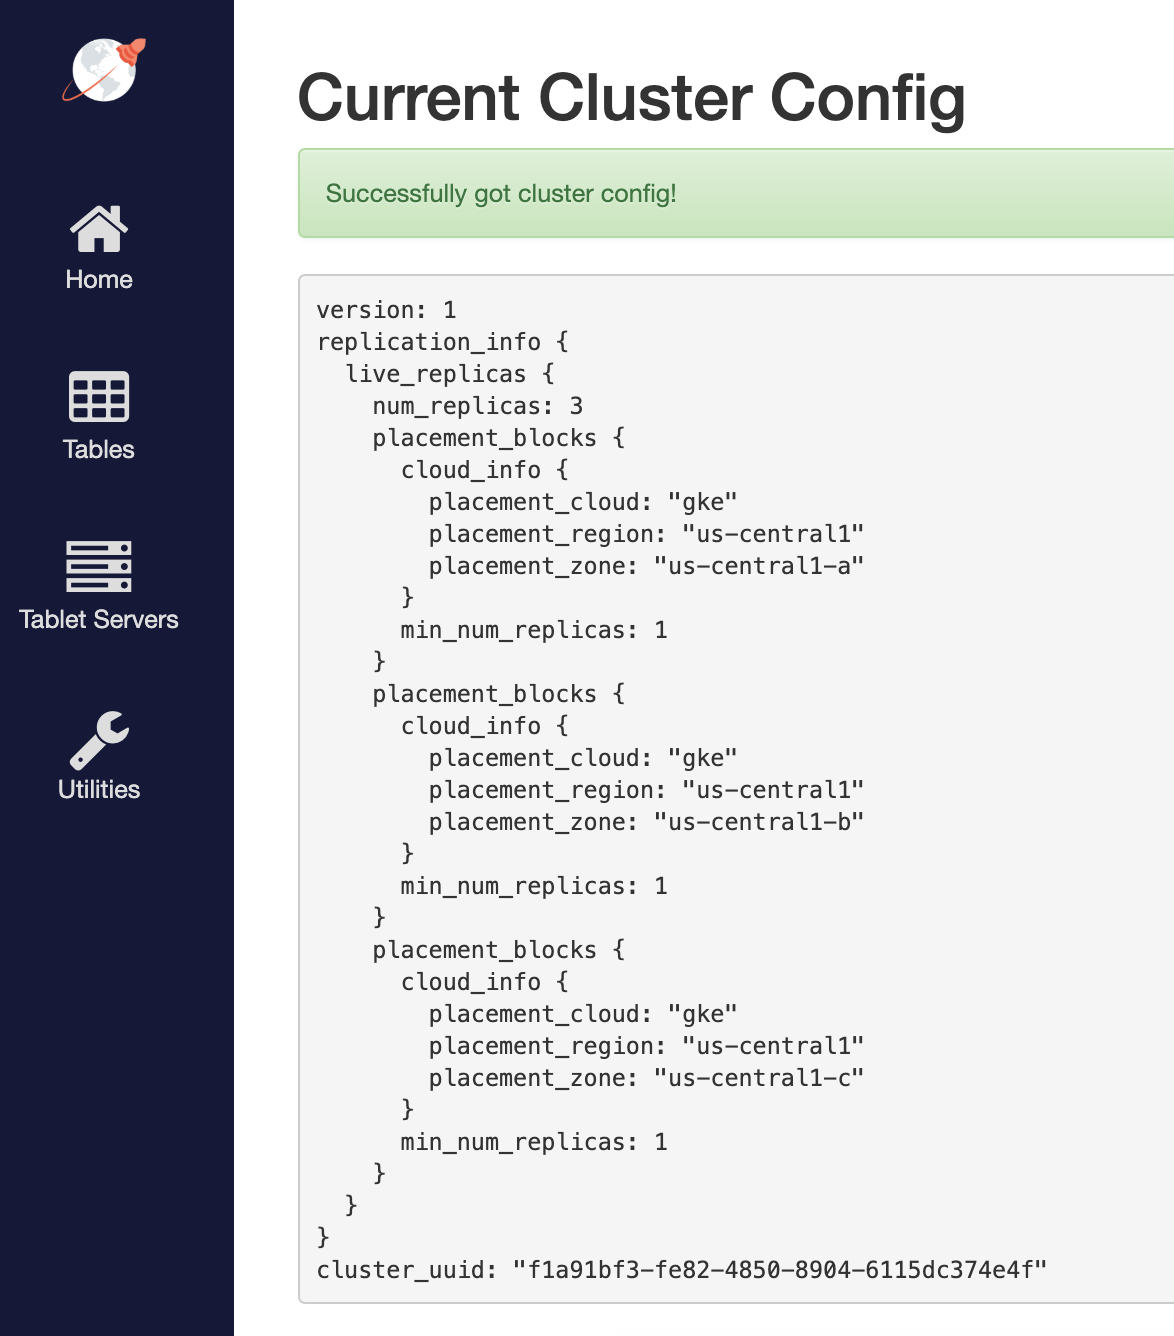
To make the replica placement zone-aware, so that one replica is placed in each zone, run the following command:
$ kubectl exec -it -n yb-demo-us-central1-a yb-master-0 -- bash \
-c "/home/yugabyte/master/bin/yb-admin --master_addresses yb-master-0.yb-masters.yb-demo-us-central1-a.svc.cluster.local:7100,yb-master-0.yb-masters.yb-demo-us-central1-b.svc.cluster.local:7100,yb-master-0.yb-masters.yb-demo-us-central1-c.svc.cluster.local:7100 modify_placement_info gke.us-central1.us-central1-a,gke.us-central1.us-central1-b,gke.us-central1.us-central1-c 3"
To see the new configuration, go to http://<external-ip>:7000/cluster-config to see the new configuration.

5. Connect using YugabyteDB shells
To connect and use the YSQL Shell (ysqlsh), run the following command.
$ kubectl exec -n yb-demo-us-central1-a -it yb-tserver-0 -- ysqlsh \
  -h yb-tserver-0.yb-tservers.yb-demo-us-central1-a
To open the YCQL Shell (ycqlsh), run the following command:
$ kubectl exec -n yb-demo-us-central1-a -it yb-tserver-0 -- ycqlsh \
yb-tserver-0.yb-tservers.yb-demo-us-central1-a
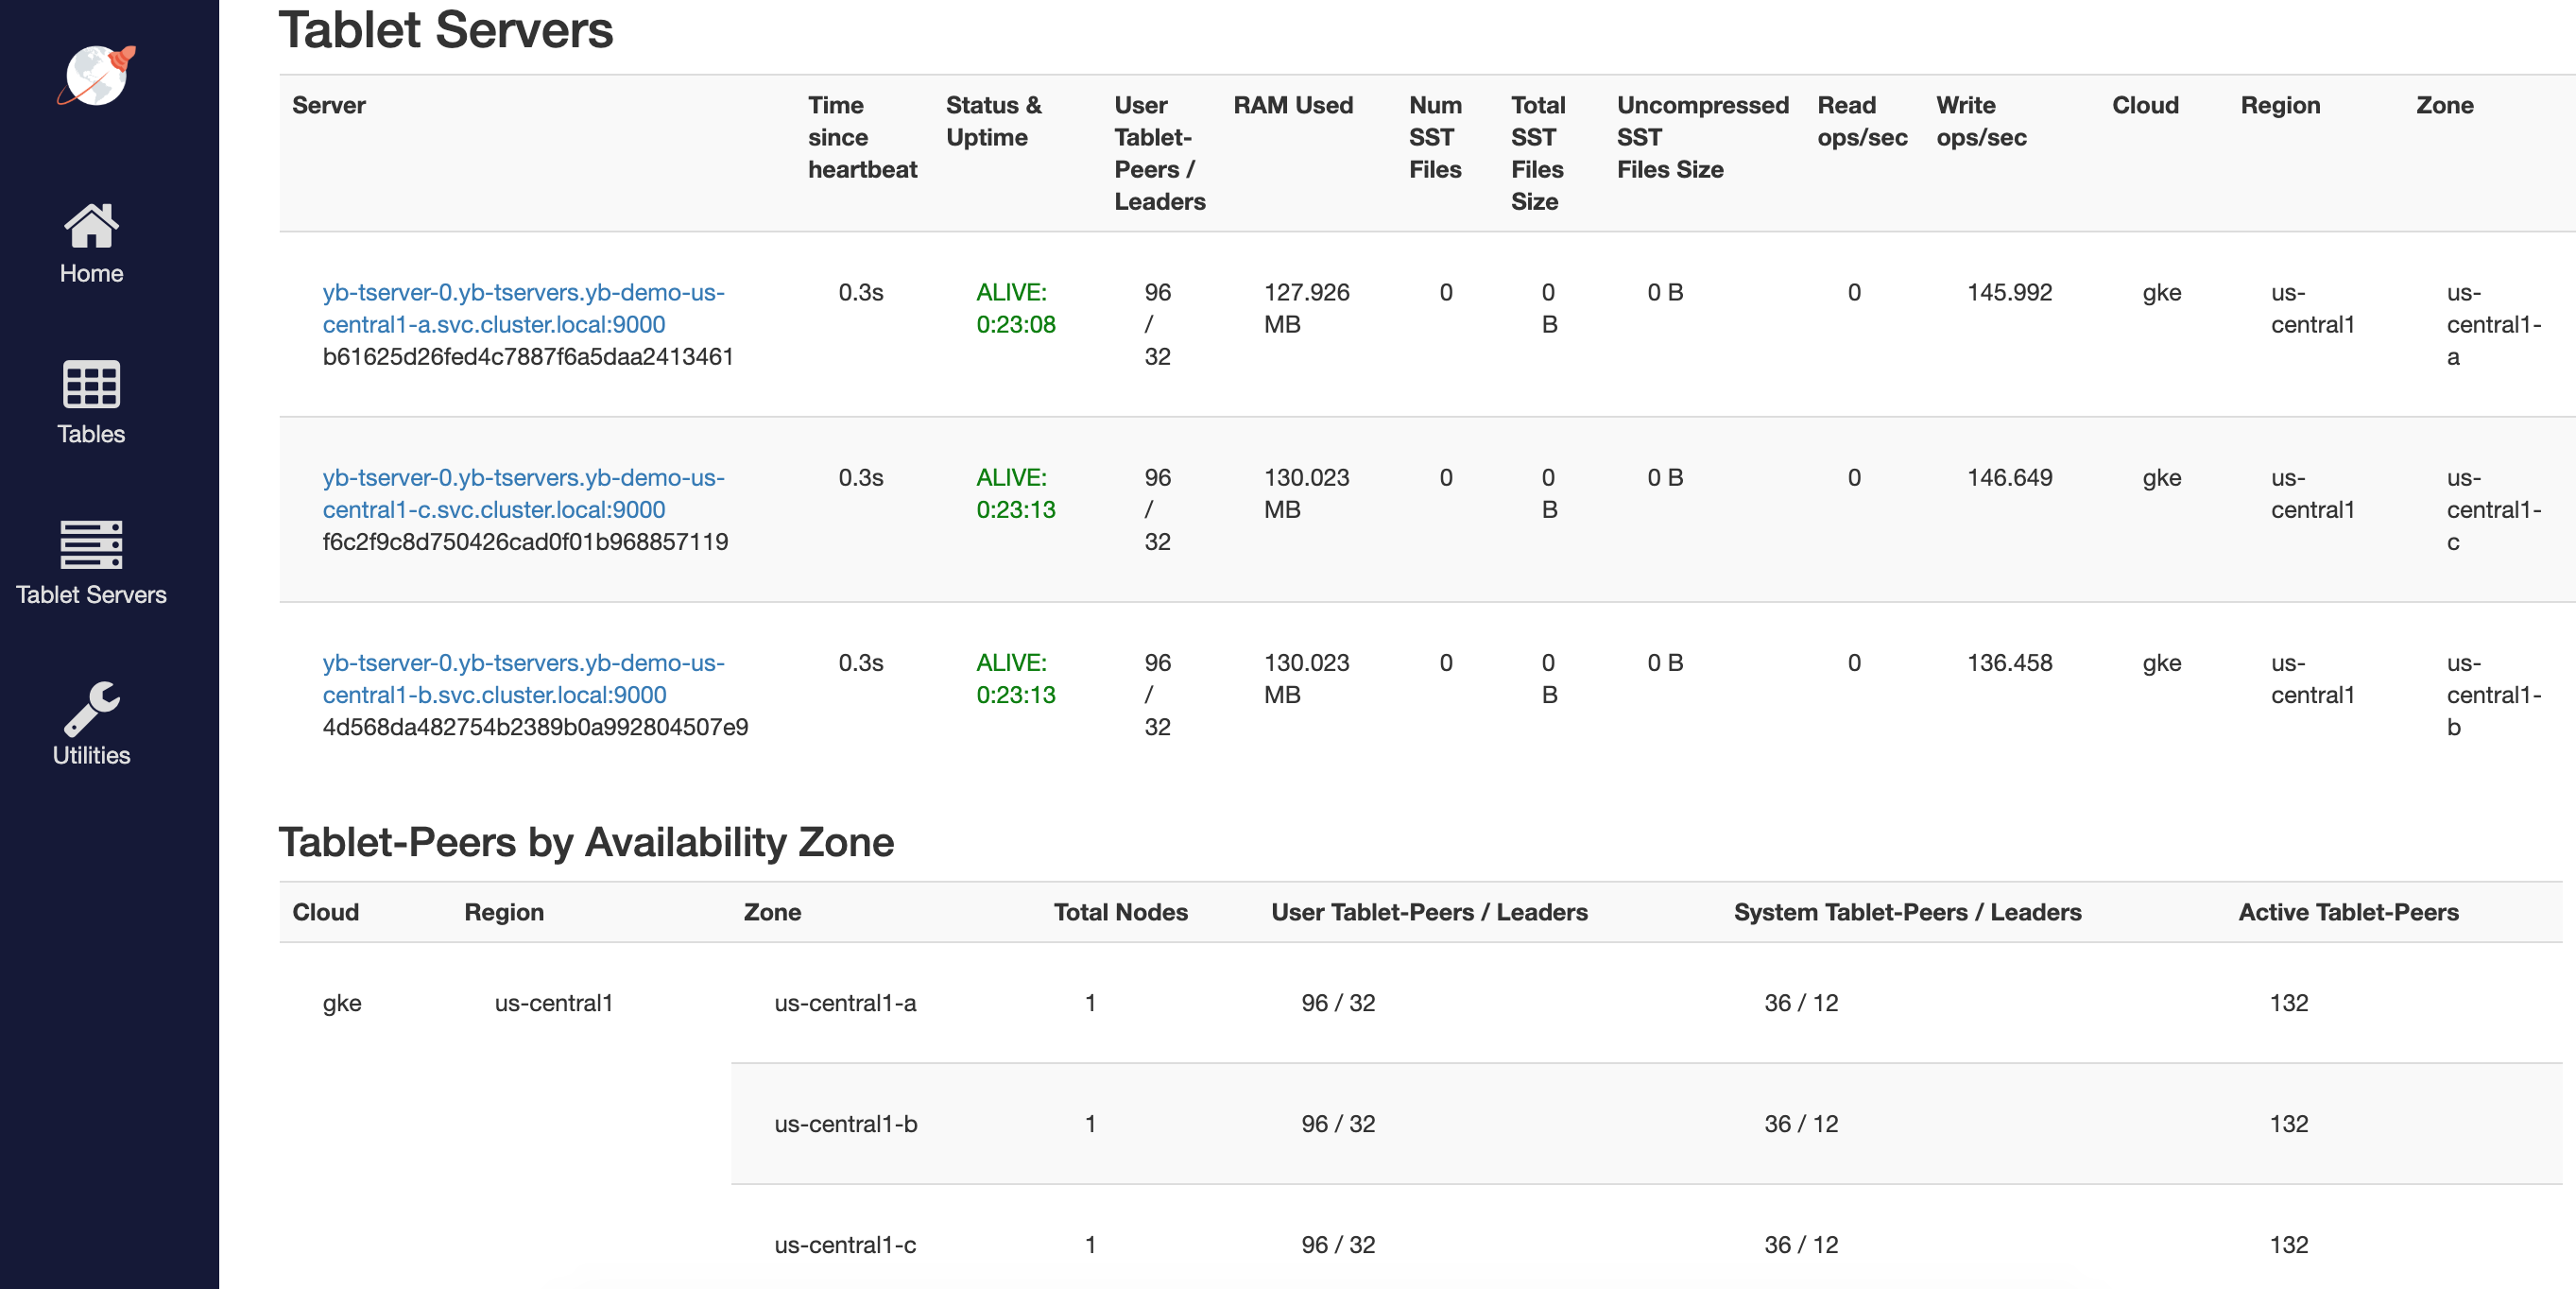
You can follow the Explore YSQL tutorial and then go to the http://<external-ip>:7000/tablet-servers page of the yb-master Admin UI to confirm that tablet peers and their leaders are placed evenly across all three zones for both user data and system data.

6. Connect using external clients
To connect an external program, get the load balancer EXTERNAL-IP address of the yb-tserver-service service and connect using port 5433 for YSQL or port 9042 for YCQL, as follows:
$ kubectl get services --namespace yb-demo
NAME                 TYPE           CLUSTER-IP      EXTERNAL-IP        PORT(S)                                        AGE
...
yb-tserver-service   LoadBalancer   10.98.36.163    35.225.153.214     6379:30929/TCP,9042:30975/TCP,5433:30048/TCP   10s
...